
Install Jeedom on Synology with Docker
![]()
The Jeedom software is open source; you have complete access to the software that manages your home automation. Jeedom is compatible with various protocols, like Z-Wave, RFXCOM, RTS SOMFY, EnOcean, xPL, etc.
Installing Jeedom on Synology with Docker it not a complex task. However for those who are not familiar with those technologies, I summarized here the installation process for a Z-wave network.
First of all, let’s look at the requirements:
- You need to have a Z-wave+ USB key plugged on the Synology
- You need to have Docker installed
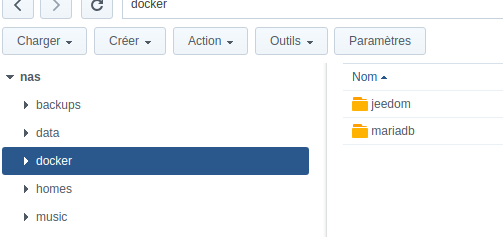
- You need to create folders on your “Synology File Station”:
- /docker/jeedom
- /docker/mariadb
Once done, we are now going to deploy a dedicated database (MariaDB) and Jeedom as Docker containers. For those who wonder why MariaDB instead of MySQL, it’s because I’ve more affinity with MariaDB but you can use MySQL if you prefer. Anyway I strongly recommend MariaDB :p (by the way here is the book I’ve wrote on MariaDB).
To deploy those containers, open Docker on your Synology then, click on “Container”, “Parameters” and finally “Import”. Then load those files (you need to upload them somewhere on your Synology first):
- MariaDB container: the password for “root” login is “jeedom”
- Jeedom container: the web application (Jeedom) is available on port 9080
First start MariaDB, wait 30 seconds to be sure it has successfuly started, then start jeedom. Now connect to http://your_NAS_ip:9080, you’ll be redirected to the setup page:

Fill the fields as described on the screenshot above (use “jeedom” as password)and click on “Proceed”. You should see this message:
"The installation jeedom is ongoing."And then the initialization logs:
[START UPDATE]
****Install jeedom from 3.1.7 (2018-01-26 23:11:25)****

Install of Jeedom 3.1.7
Install of database...OK
Post install...
[START CONSISTENCY]
Création de plugin::cronDaily
Création de jeedom::backup
Création de plugin::cronHourly
Création de scenario::check
Création de jeedom::cronDaily
Création de jeedom::cronHourly
Création de jeedom::cron5
Création de jeedom::cron
Création de plugin::cron
Création de plugin::cron5
Création de plugin::cron15
Création de plugin::cron30
Création de plugin::checkDeamon
Création de cache::persist
Création de history::archive
[END CONSISTENCY]
Add user (admin,admin)
OK
Install duration : 2s
[END INSTALL SUCCESS]
When ended, reconnect to http://your_NAS_ip:9080. You can now login with “admin” as login and password. Do not forget to change the default password !
Install the offical Z-Wave module and configure it. You should see “/dev/ttyACM0” device. If it’s not the case, reboot your Synology.
Usefull links:
